So one day I got a burr under my saddle to make a power drawbar (PD) for two reasons. One, I'm lazy. Two, I have visions of using Tormach (or similar) tool holders to give me true quick change capability. Basically I want to keep a 3/4" collet mounted most of the time and get a bunch of straight shank ER collets/holders.
Of course being lazy is at odds with making a PD from scratch so it took me a long time and I didn't really take any process photos so I'll bore you with my written description.
The first thing I did was to make a new drawbar with threads that are about 1/2" longer than standard. The PD spins really fast when the collet finally releases and I've heard of people having trouble with collets and drill chucks getting ejected unexpectedly. The extra length helps ensure this doesn't happen

My plan revolves around a used SMC air cylinder I purchased on Ebay for next to nothing. It has two 3/8" shafts that are driven by two 1" pistons. The travel is roughtly 1.25 inches which is about perfect for this application.
I also went with a high quality Chicago Pneumatic 3/8" air impactor. A lot of people get taken in by the low price of Harbor Freight goods; however, one major difference I've found is that the HF (import) air tools are WAY LOUDER than Chicago Pneumatic. I mean 2-3 times as loud. I'm not into that. Save your hearing and spend some money.
The little red and black do-dads on the side of the cylinder are pneumatic speed control valves from McMaster. They have a tiny needle valve that...lets you adjust the speed. I picked these up to keep my 90 PSI shop air from slamming things to pieces.
I also went with quick connect air brake hose throughout the system. It's awesome.
Many home-made PD systems also require taking the impactor appart, machining an adapter place, ditching the butterfly valve, blahbedy blah.
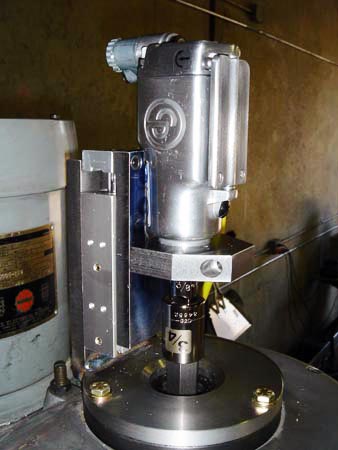
I just clamped the neck (or whatever) and called it a day. I'm just test fitting stuff in this shot. I haven't slotted the clamp yet but I managed a very tight interference fit, used some layout blue, and hand filed the neck of the impactor to get good contact with the clamp.
Another thing I like about this setup is that the air cylinder acts as a "spring" and keeps the drawbar in the UP position with no other springs needed. Potential safety issue? Meh. I just need to remember to turn the compressor on.
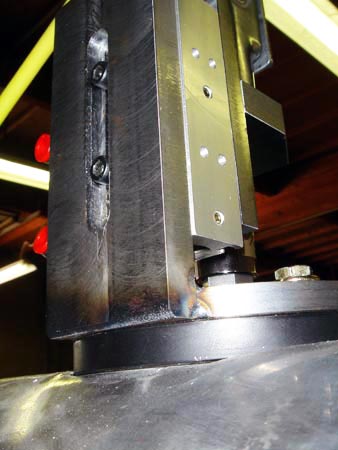
The base is made of two parts; the round mounting base and the vertical backing for the air slide. I used the original mounting holes on the top and used longer bolts to reach the extra 1/2" introduced by the plate.
I chamfered and welded the two pieces together. Each one is 1/2" thick.
I also added plenty of room for vertical adjustment to fine tune the travel and height. As the impactor "unscrews" the drawbar it will move up the spindle. However, you need to deliver a "whack" to release the collet. So...my plan was to leave about 3/8" gap between the top of the drawbar and the bottom of the socket, with the slide in the "full down" position.
As the drawbar unscrews, it will bottom out into the socket. Since there is about 180 lbs of downward force being applied by the air slide, when the drawbar bottoms out on the socket it...should...eject the collet...right?
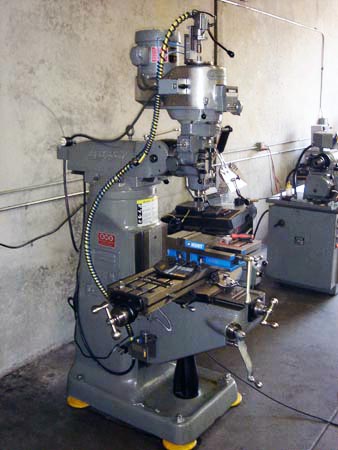
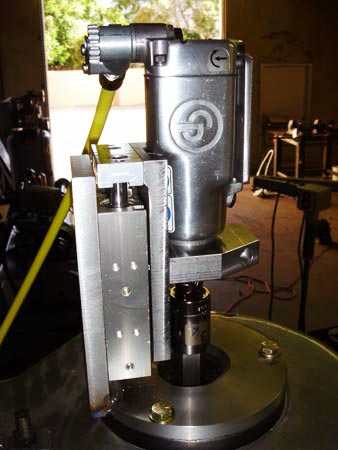
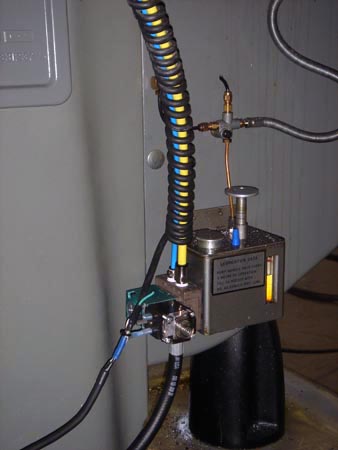
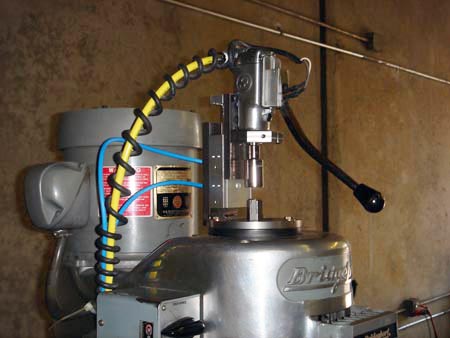
Here is the final result. We'll zoom in on some of the details in the next few shots.
The big "coily" thing is more than just some cable wrap...much more. Muahahaha. Sorry, this is my favorite part. I found a huge length of coiled cable at the local junk place. It's like the coiled wire on headphones but industrial size.
I figured I could use this to wrap up the air lines and run power to the micro switch that controls the air solenoid! It works beautiflly if I don't say so myself.
I also drilled and tapped one of the mounting bolts taht keeps the head from swinging so I could mount an Adele clamp to provide some strain relief.
A picture would be nice but there is also a power strip mounted vertically on the back side of the old BP where I plug in...stuff.
Starting at the bottom we have the air solenoid...another Ebay find. 1/4" NPT ports and 120v coil. Perfect!
I also had McMaster make me up a 3' whip that threads into the incoming air port and I just attach one of my shop hoses to the end of that.
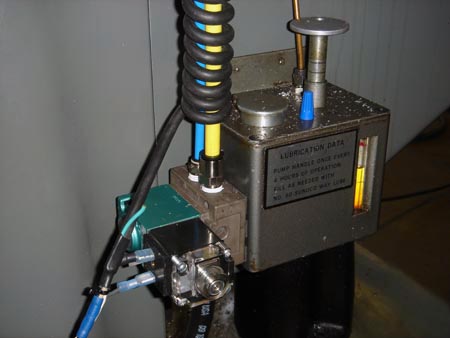
I just mounted it to the side of the oil reservoir with double sided tape. Here you can also see the straight end of the coiled cable as it attaches to the solenoid and the power cord.
I replaced my "trouble shooting" twist cap with a more secure butt-splice.
Moving up the line...you can see the plastic Adele clamp in the very bottom left of the shot.
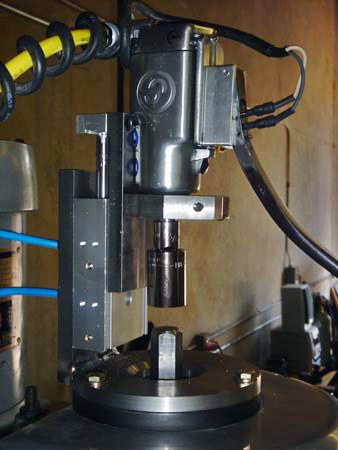
When the system is not activated air is supplied through the small blue tube on the left. This holds the air slide in the UP position.
When the switch is activated the solenoid switches the air supply to the larger yellow hose. (bottom left)
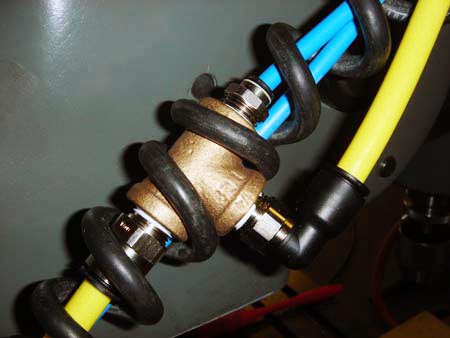
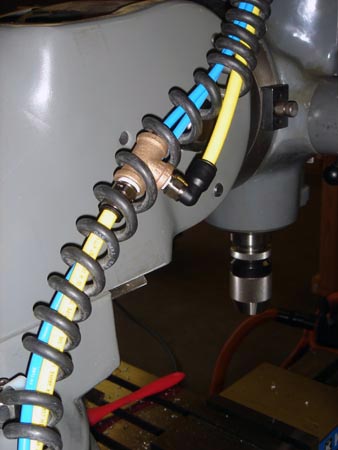
At this junction the small blue hose is pressurized and forces the air slide into the DOWN position. At the same time air is supplied to the impactor through the yellow hose (90 deg elbow) but does not activate the impactor untill the handle is moved to the side.
This will be more clear later, but most systems do both at the same time. Doesn't make much sense to me. I don't want the impactor turning unless the socket is seated.
Just a slightly closer shot. You can see the two wire leads that attach to the micro-switch that activates the solenoid.
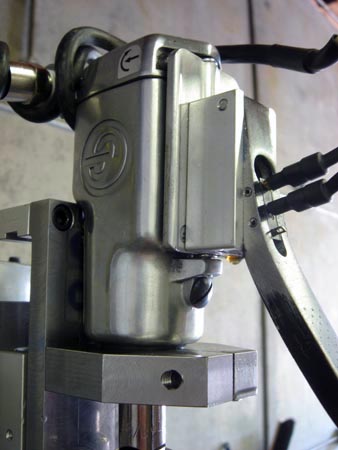
And closer yet...
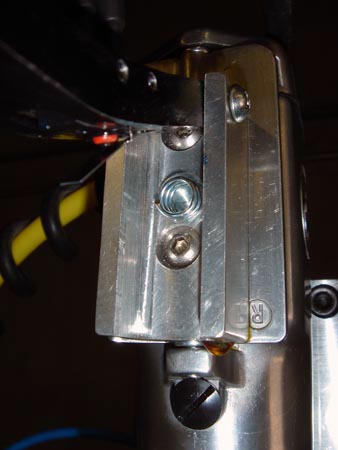
The switch is held in by a couple of roll pins.
You can also see the slotted clamp a bit more clearly. I picked up a (toy) truck load of slitting saws and arbors at a local industrial auction for about 50 bucks.
This is an under the hood shot. I'm just holding up the lever by hand. The two button head screws are tapped directly into the butterfly lever on the impactor.
The spring is seated in a countersunk hold and held in place by a liberal gob of silicone O-ring grease.
On the left side you can see the micro switch (red thingy) and the lever arm attached to it.