So, your power drill battery dies. What now? Fork over 85 bucks for a new one? I don't think so. After searching high and low on the internet for a good price for a replacment battery I found the retail for my Black & Decker 14.4V to range from 35-85 dollars.
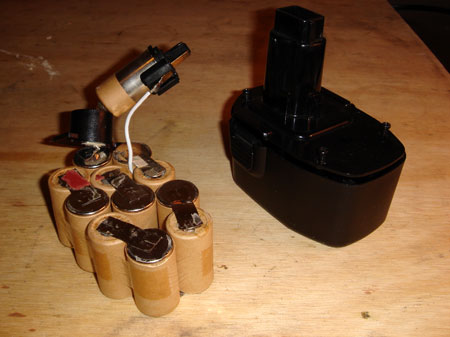
35 is okay, but I had a little brainstorm and decided to open this thing up and see what makes it tick. Surprisingly the internals were all too familiar. A simple "Sub C" rechargable cell from my RC car racing days. I used to build all of my own battery packs so this seemed like a good opportunity to make a modification.
I had visions of using batteries that power world championship RC cars and transform my moderately powered B&D into a drill that would make screws and yet-to-be-drilled holes tremble with unspeakable fear.

At this point I came back to reality. The racing batteries alone would cost a hundred bucks. So, I settled on a brand name NiCd cell from GP. The main difference from the stock batteries is that these are 2000 mAh cells and the stock ones are only 1700 mAh...so I should get more run time...basically a bigger gas tank.
These fellas cost me $1.79 each for a grand total of $21.48 from www.budgetbatteries.com. So far so good.
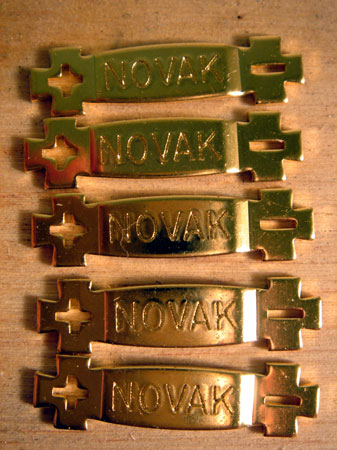
Next up on the bill of materials are some more RC parts. These 24k gold plated battery bars are from Novak racing. I couldn't skimp everywhere. A bag of 28 was about $14.00 from Tower Hobbies.
I only needed 10 to assemble one pack, but I have another drill battery waiting do die. So, that's five bucks for the bars and up to $26.48 total. Still ten bucks shy of the best retail price I could find ($35.00) Incidentally that price was direct from Black & Decker.
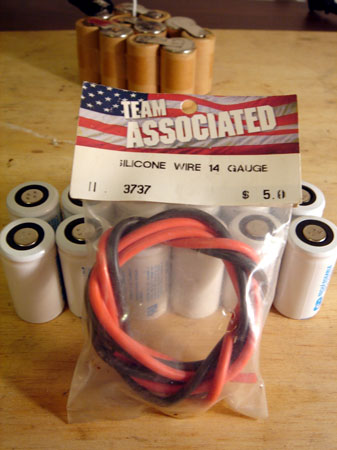
Finally we have some 14AWG from another top RC company. Just had this lying around and I only needed about 3 inches so let's call it free.
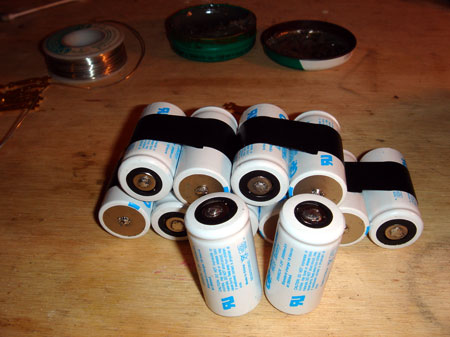
I paried the cells and bound them with electrical tape just to help me solder them together. Don't forget to tin both ends of the battery before you try and attach the bars.
I should mention that you will need a pretty serious soldering iron to get this job done.
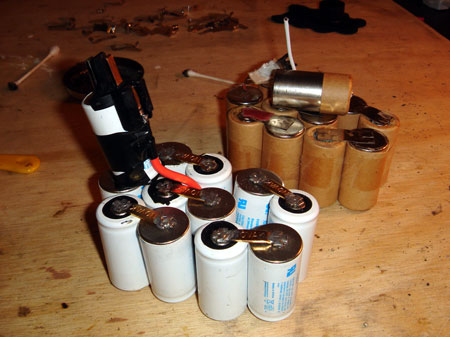
After getting the battery assembled I removed the electical tape. The bars are very rigid and have no problem holding the pack together.
The only tricky part is the cell that sits on top (red wire attached) goes up into the shank of the battery case. The little black plastic bit houses the stock connectors that mate with the actual drill and charger...so save that and be careful not to brake it.
The top battery needs to be attached to the battery direcly below it and sit slightly offset. B&D accomplishes this with another plastic part that I tossed. I used one of the stock battery bars that I pulled off the stock battery pack since they were thin and flexible. Both batteries were soldered to the sock bar while they were sitting next to each other. Then, to move the one onto the top, I just folded the battery bar in half...clear as mud...I guess I should have taken a picutre. Finally I wrapped the bottom of the top battery with electrical tape to prevent any shorting.
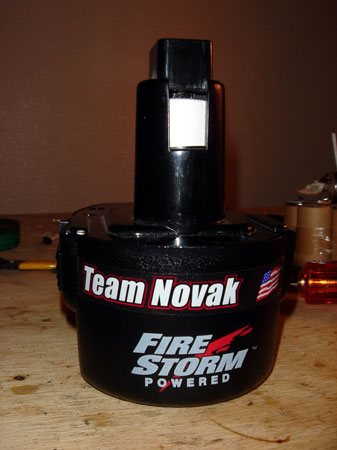
Well, that's it. Took about two hours from start to finish and it went back into the case quite nicely. I put a Novak sticker on this one so I would know which pack was my uber pack. Charged it, put it into the drill and it runs like a champ.
You can hear the difference compared to the stock battery. This puppy is just begging for some heavy drilling. Time to pull some screws out of my shoptask crate. Crate? I just moved and I'm in the process of setting up my new shop space...stay tuned.