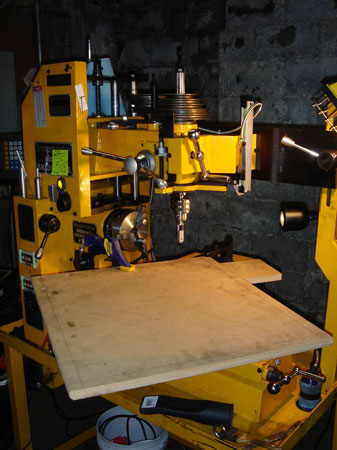
DeWalt Multi-Cutter Saw Table and Shield
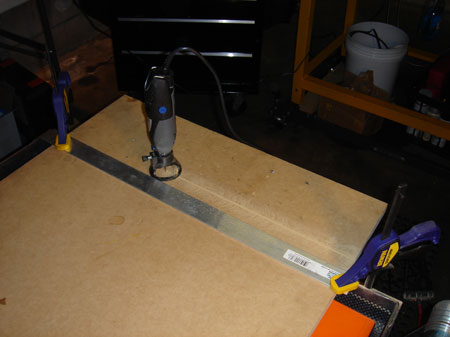
Yes I'm cutting a .75" sheet of MDF with a Dremel tool. Why do you ask? I didn't have a saw that would do this job so I scrounged around in the drawers and found the next best thing.
I've come to a point in my tool collecting career where I caught myself scoffing at the feeble Dremel...just before I bought it. It's just not a "real" tool...or is it?
That router bit devoured the MDF shrieking like a banshee all the way. I made sure to do it in the middle of the day. I figured that kind of noise would attract the attention of the police if anyone heard it late at night.
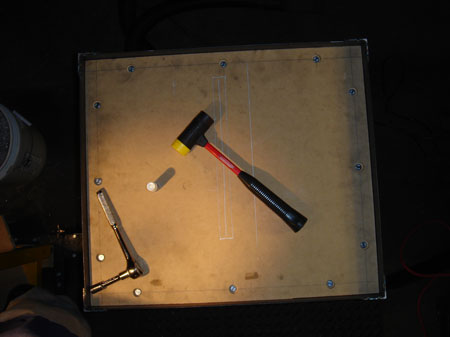
This was an interesting process. My sheet was 21 x 24 so getting my marks under the tool bit was challenging. So was holding and clamping it.
I used the LC/EF to spot the holes and secured it with a quick clamp when I got it close. I used a regular machinist's clamp (those angle thingys) to secure the back side.
Ah my kingdom for a huge CNC router...anyway.
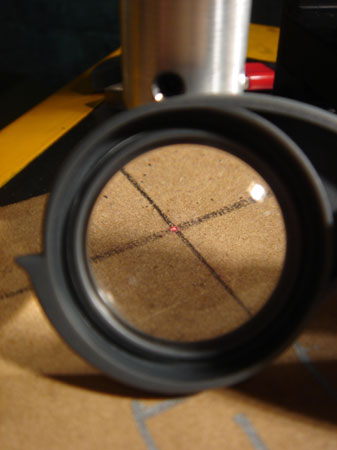
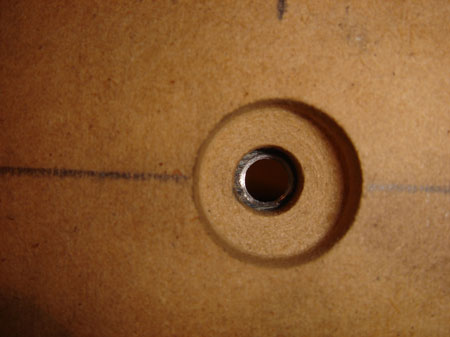
I've taken to using a 15x loupe to do the fine spotting with the LC/EF and this is magic. Is it accurate...enough? Well if you consider the dot size is about 1/6 the width of the pencil mark then yeah.
The unit I'm using has a .010" hole in the nose as opposed to production units that have a .0035" hole. I like this one better for drilling and use the fine one for machining. How did I get it? Job perks...it's a prototype.
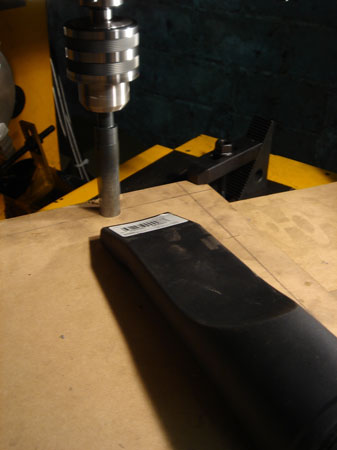
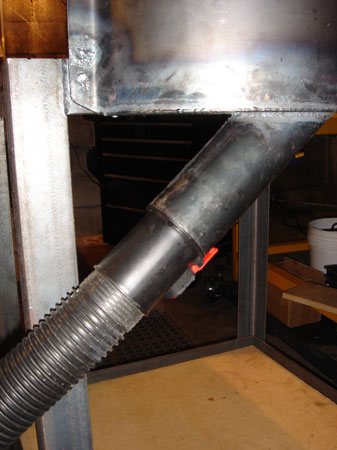
Science is fun. Here I'm using the "car" attachment for my shop vac. Because of the profile on the opening of the nozzle it will suck itself to the table while picking up the MDF dust from the drill. Nifty.

I put three holes on each side and then dropped the MDF into the frame. A Sharpie fit nicely into the holes on the MDF so I used that to spot the holes in the 2" angle iron frame.
If anyone is wondering, one 4 x 8 sheet of 16ga HRS and 40 feet of 2" angle used up about 90% of the material between my shop cart and this table. It was mostly accidental. I have about a foot of angle left over.
Yep that's close enough for me! I drilled and tapped the holes with a power drill...my drill didn't like that much...I think I need new batteries or something. A little TapMatic goes a long way.
I over drilled the MDF a bit to give me some leeway in mounting. A couple holes where a tad off, but it went together just fine.

These stainless bolts are 8mm x 16mm /1.25 pitch. Why metric? Why not?
Well, that looks like it should hold a chop saw eh? I'm going to mount the saw to the far left so my pieces don't fall on the floor anymore.
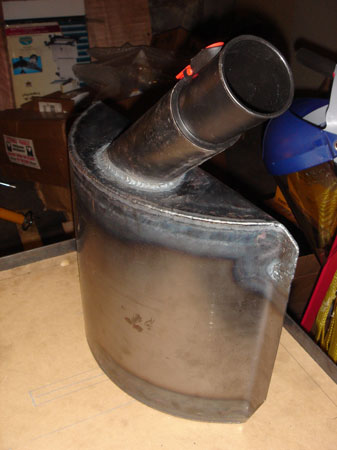
Next I mounted the vaccum shield I made down at welding. All the TIG welders were being used, end of the semester rush, and people were avoiding the gas like the plague.
Being a fan of plagues I waded in and gas welded the whole number. It actually worked out nicely and I really like gas welding. I've always been more prone to playing with fire than electricity.
The tube was a bit tricky. It started out as some 16ga sheet. I rolled it as far as I could on the mechanical roller and went the rest of the way, working cold with a big hammer, a steel tube for a rough madrel, the anvil, a lot of patience and the worst blood blister I've ever given myself.
The plastic connecting tube is just some gizmo (purpose unknown) that came with my vac. Anyway, thanks to whoever put that useless thing in the box.

The hardest part was actually cutting the oval hole in the base of the shield. The air had been turned off so I couldn't use my die grinder and ended up hacking it out with a cutoff wheel in a 6" grinder. By hacking I mean some real Freddy Kruger stuff. A couple spots required healthy application of filler rod.
I also like the fact that it looks like a muffler from this side. A very cheap muffler, like the one your cousin Earl said he could "whip you up in no time." There is probably some sort of sensible shape and location for this thing, but I just did what my hands told me to do.

You might think I like photos of stainless hardware. I do. These are to secure the saw to the table.
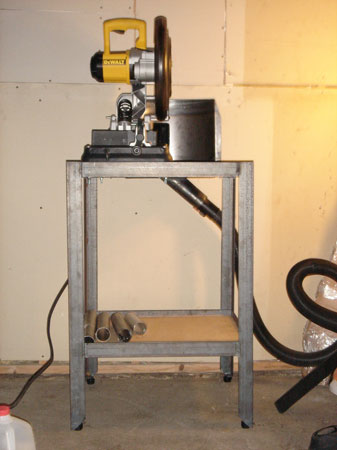
Well, that's it. I angled the bottom of the legs and welded in some brackets to hold my self leveling feet. Well, I mean the self leveling feet I bought for the table, not MY feet...though they too are self leveling.
The shield sits a bit off center from the blade...yes it was on purpose. It picks up about 75% of the junk that flys around, but a good portion still escapes to the right hand side.

I mentioned this before but I'm going to mention it again since this is one of those times where I'm feeling very clever. The crane is set up on the left side to support the stock as I cut it off. A loop of chain does the trick and you can even adjust the height for different dia stock.
Mostly I'm pleased with the fact that I can use the crane for more than the two days it took me to lift the machine. It also makes a lovely coat rack and gives the gallon water jugs a sense of security.
Geez I must be really thirsty right? Ah that water is waiting to be poured into an anodzing tank. I'm just getting that set up now. I figured I was on a roll so why not do something else I probably shouldn't be doing at home?
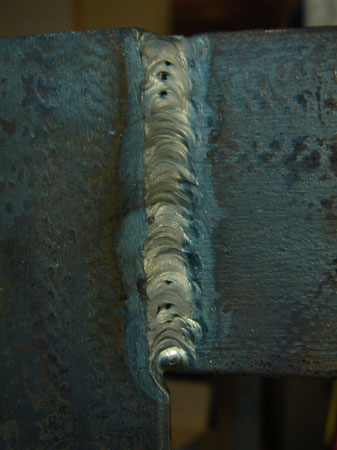
Since I tourtured you with all that text here is a way to get back at me. This is a TIG weld (cough), no filler, just a fusion weld top to bottom vertical. I think I managed a better job than with the shop cart thoug.
It would be an okay weld without the little holes which have some sort of scientific sounding name...inclusions? Anyway, I'll blame it on crappy steel instead of my technique. Cheers.