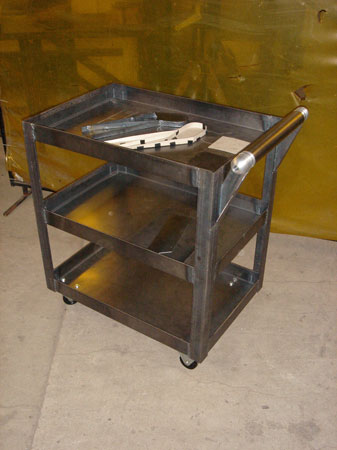
Sort of off topic, but I've been taking a welding class and decided to put together a shop cart as one of my projects.
Trays are 16ga mild steel. The top edges were folded on a pan brake and hammered flat. The legs and handle bracket are 2" x 1/8" angle. I decided to TIG weld the whole thing, which has been an interesting experience.
Click the link below to rent welding "how-to" videos from SmartFlix!

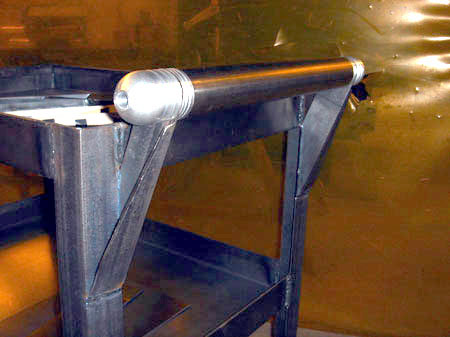
The handle is .070" wall 6al-4v Titanium...long story, and the bar ends and mounting lugs I machined.
The whole thing came out surprisingly square. At least all four wheels touch the ground at the same time so I'm happy there. I had to cut one of the brackets loose and "fudge" it a bit after going in to fit up the handle.

This looks a lot better if you get up and stand back about 10 feet from your monitor. Nah, I just checked, 12 feet is better. I'm about a million miles from a stack of dimes, but at least there is room for improvement.
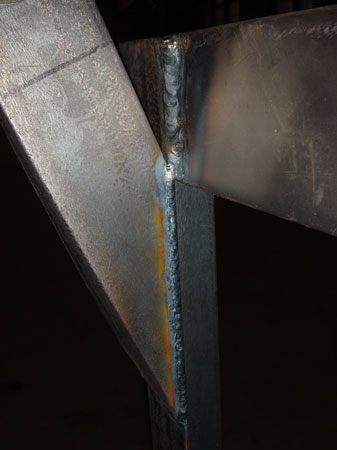
This is a vertical TIG weld with no filler. I just fusion welded from top to bottom. This is the first thing I actually tried to TIG, besides practice pieces, and I was having some trouble keeping the heating consistent. I was actually kind of tricky to keep the puddle moving along without filler...or so I thought at the time.
I think I did a much better job on my saw table. Still no filler but the width of the bead was much more consistent.
Man, welding is really hard. Some of you are laughing now. I've always had respect for good welders, but after trying it, some of the welding I've seen blows my mind.
Custom bicycle builders like Merlin Bike and Manitou are great examples, it gives me goose bumps just looking at them. Merlin's are all titanium and just georgeous. They don't make Manitou's anymore but wow, nice bike, nice machining, nice welding. That's what I call a dream machine.
In my class we have some examples from and old instructor. I guess he was a boiler maker for twenty years or so. His TIG stuff looks better than a robot can do it. Maybe if I keep doing this every day for 20 years I will get good enough.
The handle brackets are also 2" angle, so I made the round end caps stick out two inches to take up the step in the profile.
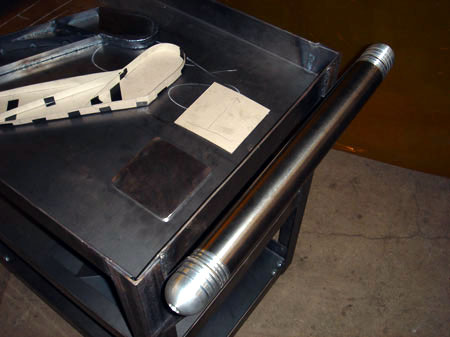
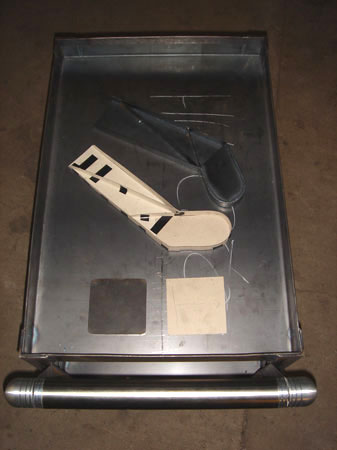
You can see my DRO mount project in the tray. It went together very nicely...though some of you may notice that my steel version is the mirror image of my cardboard model. Whoops. Going to start over today.
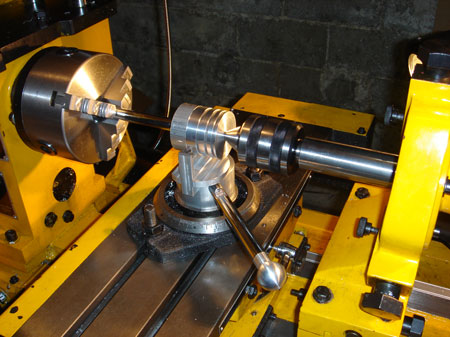
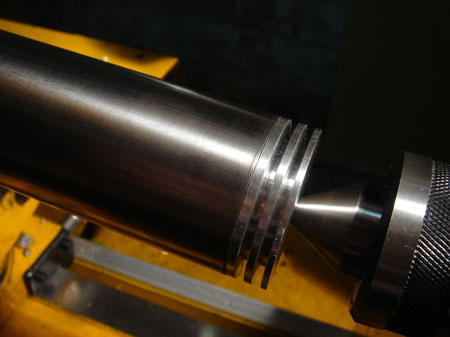
I wasn't going to be able to turn the hemisphere with the piece directly in the chuck. There isn't enough clearance with the turning tool to get in that close.
So, I took a page from my billet handle book and threaded a rod into the billet. I thought the live center would help lock things up and it would go nicely. I was wrong.
What's the problem you ask? Well for some reason neither end cap threaded straight. When I turned on the lathe they both wobbled pretty badly and looked like it was doing bad things to my tailstock. I hit the hole with a countersink and that helped some, but I'm still puzzled.
Anyway, it wasn't "too" bad so I clamped the rod up as close as I could and did away with the live center. As you can see it went okay, but not my most precision work. The setup was more solid than expected.
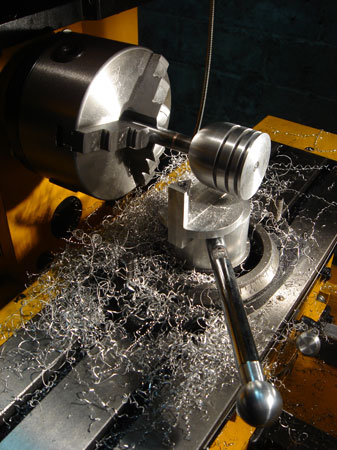
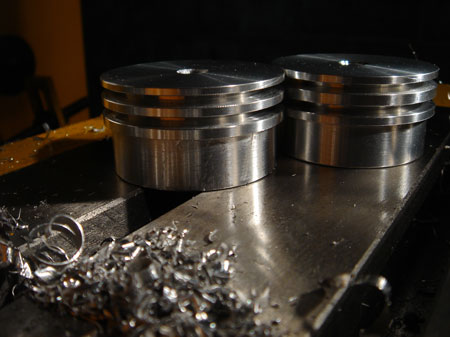
They came out quite nicely, if not a touch off center, but you can't really tell just by looking at them. after I turned the radius I fliped the part and bored out the hole that was threaded and then bottomed with a 1/2" endmill. This would provide the clearance for the head on my cap screw and now my work holding is invisible, nice.
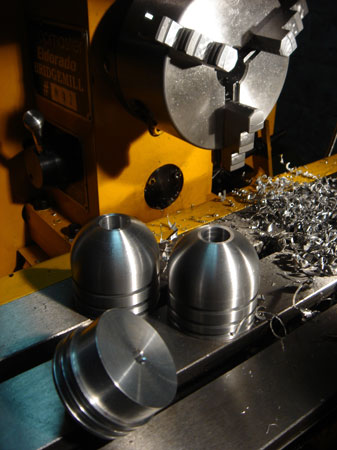
The part in the foreground is the lug that slip fits inside the tube on one end and receives the cap screw on the other. I will probably epoxy the lugs in place one I get the fit dialed.
Glamour shot...
This lug recieves a cap screw from the end cap. I put both caps in and turned the handle between centers to polish it with a maroon pad.
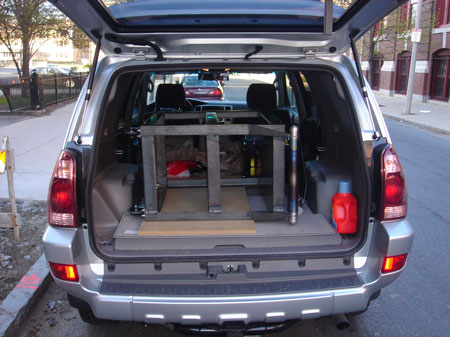
So I took all my handle parts down to the welding shop to get everything fitted up. Getting up a flight of staris was interesting, but it fit nicely in the back of the car. Securty wouldn't open the gate for me so I could use the ramp. Thanks guys.
You can see the fade I put on the Ti tube with the gas welder. It was pretty touchy but turned out okay. It would have been a lot easier if I could have put it in the lathe and turned it while heating it.
I also did some laundry earlier...I'm recently a big fan of "Tide with a 'touch' of Downy."
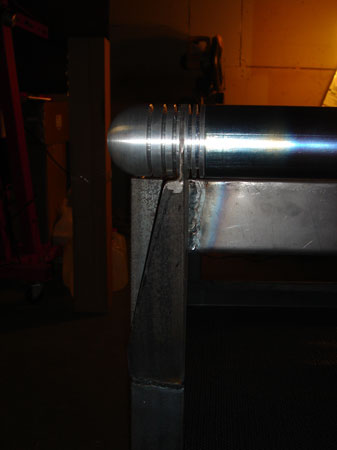
The Ti fade matches the temper colors on the steel. I didn't really think about that before hand, but hey it works for me.
The bracket was an intersting exercise. I spent some quality time with the bandsaw and grinder. Burned my fingers a couple of times but they fit better than they might have, I'm actually surprised.
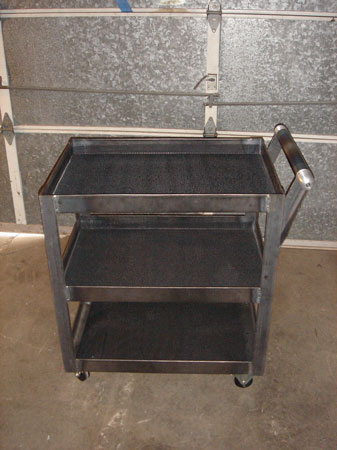
I cut up a roll of rubber drawer matting I had lying around to put on the bottom of the shelves.

Laden with goods and goodies. You can see my future DRO bracket in the top tray, primed grey. I went ahead and built another one...the right way.
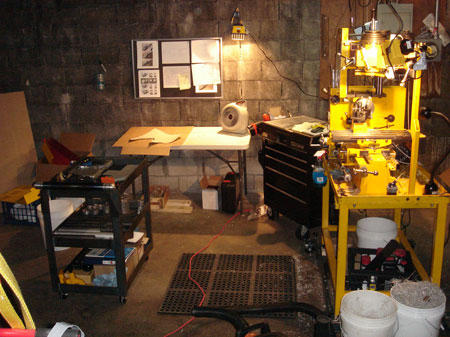
The ol' shop is starting to shape up pretty well. I'm already running out of space though. Suppose that's not a surprise to anyone. I wasn't sure where to put the cart, but I think I'm actually going to leave it in this spot.